Tuesday 29 March 2011

Too Long PART 2

Something funky happened with the blog so I had to split it up into 2 parts.

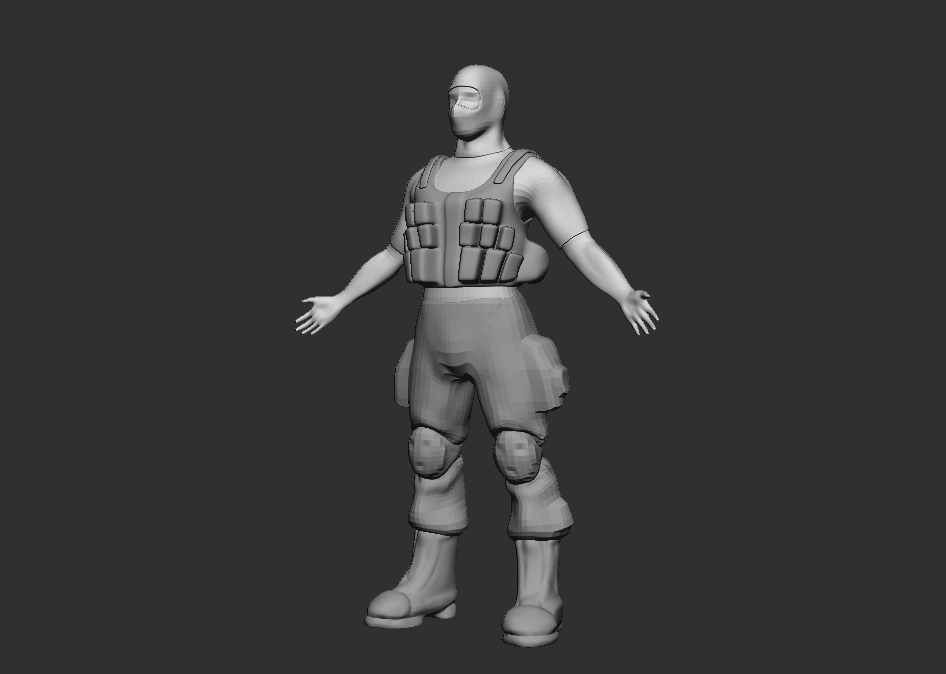
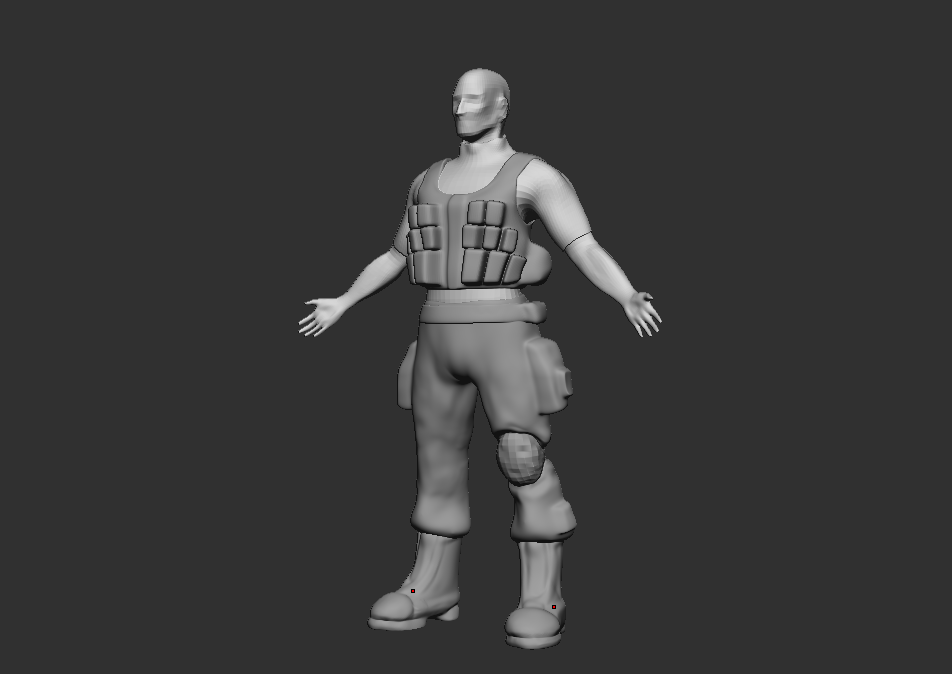
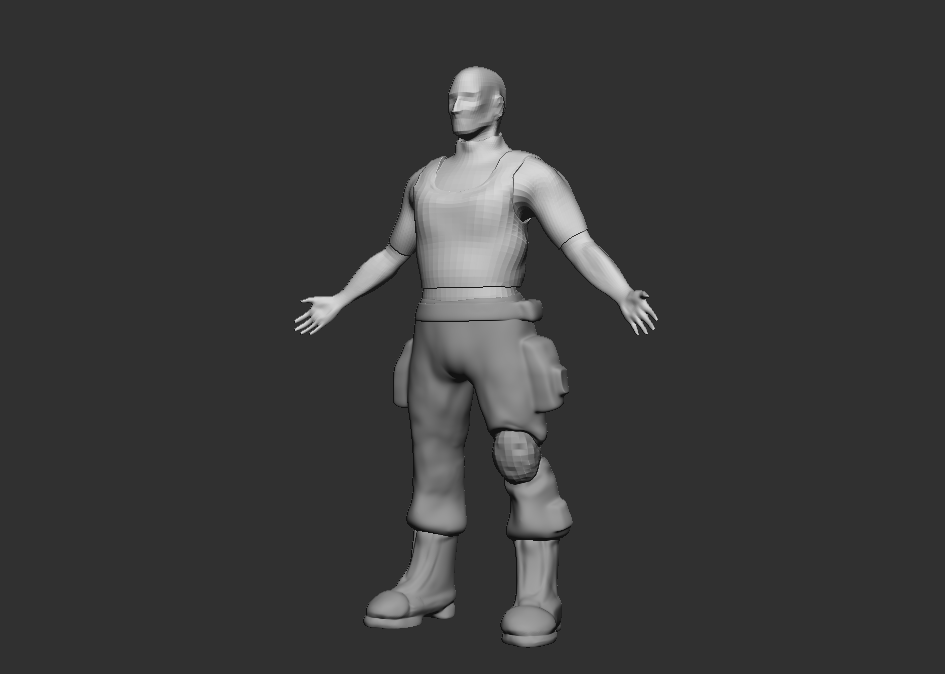
SO! Next is the current state of my Hi Res Multi version soldier.

I should really explain this before I go on anymore.
The purpose behind this is, by using ZBrush's awesome SUBTOOL function, I can create new sections of the mesh, completely separate the main mesh, within seconds. By doing that, I can create multiple versions of sections of clothing and tactical gear. A good example is the pants, I have 1 set of pants with both knees padded, 1 with the left padded only and 1 with the right padded only, so right there I have a possible 3 variations of a soldier. By doing more and more I can (with in reason and time scale) have as many soldier variations as I want as long as they all adhere to the same scaling and general gear set, no crazy sets of gear, although that can be  made in MAYA and then imported in easy.

So here is the break down of what I have thus far. (Should be know that this is my first full scale, Hi Res model, and its a big one... yet another baptism by fire, paying off though!)

And right there we have 5 variations on the same model, true the variations aren't mind blowing but within the realm of game characters that's enough to provide freshness. These obviously aren't finished, more gear and a couple of different helmets and then we are done as well as all the hard surface modeling on these that I have to get my head around.  Within a team this could very well be my job, I could get the brief and my task could be to create ... say... 10 variations on the same theme, by using Zbrush and its awesome subtool master I can get variations, and apply them into low res characters with all the normal/bump/specualar and textural data perfect.

And well... for now that's it, I do intend to update much much more.

PEACE!

Too Long PART 1

It has been way to long and with way too many progressions in my work to have left the blog unblogged... my bad.. i guess.

So... Part 1... Current state of the render.. well thats now turned into a web based Demo! You heard it right, a demo that you can download from here. OVERLAND BETA DEMO. You will need to download the unity plug-in to play it, which can be found easy by googling it... you lazy buggers!

 So here are some snap shots of BETA testing ground (It should be known that the current state of the demo is in a test bed arena, Final build will be in its own scene.) The testing ground is where I bring in new assests, test them, skin them. Script functions and then test said scripts. Lighting and general running of things.

General look at the area, I took the decision to use glow sticks to give much more of an eerie feeling about the place. As there is no power, I want to put across more and more that this is a "safe house" of sorts, and with introduction of other elements I shall reinforce this, giving the room much more character and a history instead of a soulless room. As I am one guy working on this, this will more then likely be the only playable level for a while until I properly get my head around UNITY3D it's tools, the process of game developing and scripting. Not to mention the amount of time it takes to model everything by yourself.
As I said in the previous caption, I want to reinforce the sense that your not the first to be here, hence the glow stick (emergency and improvised lighting) On these two tables will be a variety of props such as; maps, pens, rations, emergency supplies and even the odd weapon. Along these two portions of wall I want to have graffiti along the same lines as the graffiti in the safe houses in Left 4 Dead, again, telling the player that this has been used by others. Messages will consist of notes to loved ones, instructions on possible escape, warnings, messages of fear and other emotions that would come in this situation. To make these more apparent I may need to alter the lighting slightly in this area so that it is easier to read, though the use of a flashlight PreFab and scripting may help me keep the lighting and still over come this problem.
An area I'm giving careful thought about is the corner with the four bodies and the canteen shutter. I want to instill some form of remorse in the player, so this area I want to be an area with quite a few elements that create more of a back story, the chair in the corner is the first installment of that, with soon to come beer bottles, the thought behind this is that the chair may have been put their by a past inhabitant who may have been morning the loss of friends, I'm not sure yet, but I would like their to be some understandable story here. As I speak actually I'm making a list of trickets and photo ideas that could be placed on and around the tarps, some visual stimulus for the player, also something that reacts with the lighting in this area as well as creating a mood.
The old scaling model is gone and has been replaced with a base mesh I created in Zbrush, this base mesh is actually being used to create props for a later area, a storage/repair/maintenance room, lots of broken and unused equipment and lots of oppotunities to play with lighting  and sound. All in the future though.
A message for players (Might remove it, Cuts the mood of the area.)
Still working on these bloody lights to get the right Lighting affect. As I cant import lighting from Maya, I'm forced to use unities lighting system, which admittedly isn't amazing, but this is free software so I'm making the best, it does get quite challenging when you try and create more mood lighting than obvious lighting.
The scene with lighting off.
I had to take a lot of props out because of scaling issues, shit just didn't look right yo!
I love my menu board, don't know why.